Make Your Own Fruit Press
This page contains free plans and step by step instructions on how to make your own apple press. I took the photographs at various stages when I made mine.
Plans |
|
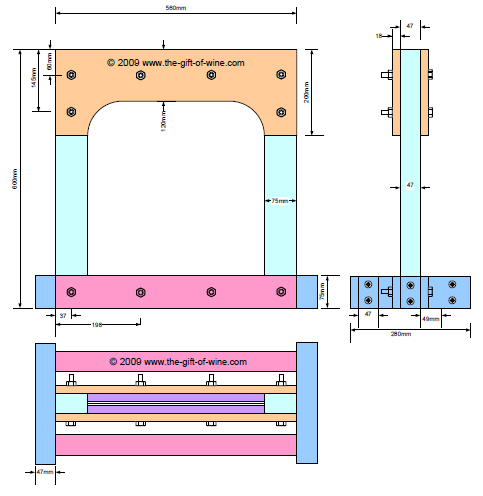
Download the Fruit Press Plans.
Study the plans and the following assembly instructions carefully before you begin. |
Tools You Will Need
Saw  - I used a Jigsaw
Workmate  or Workbench
Electric Drill and Drill Bits
Set Square
Clamps
Screwdriver
Socket Set or Spanner Set
|
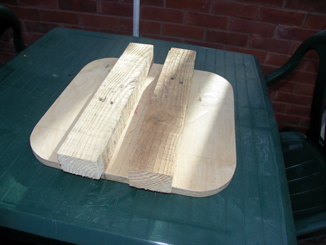
Step 1 - Cut the Timber
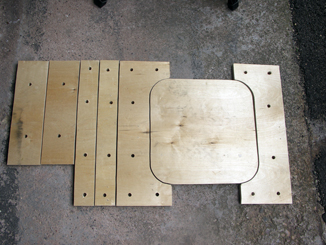
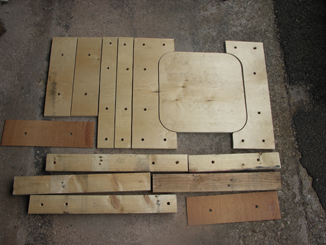
This photo shows all the timber used.The parts at the top of the picture are cut from a single piece of 560 x 1040mm x 18mm plywood. These are shown in the next photo. Study the plans to see where they all fit in. |
The two darker pieces are cut from 6mm thick plywood.
The remaining pieces are cut from 75mm x 47mm (3inch x 2inch) rough sawn timber. |
 |
| |
|
Pieces cut from a 560 x 1040 x 18mm plywood sheet (repeat of part of picture above).
The holes were not drilled at this stage but were drilled during the assembly process.
I used a Jigsawto cut my wood. |
|
| |
|
Step 2
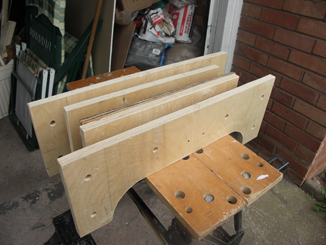
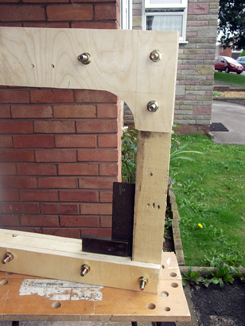
Assemble The Top Bar. Bring all 6 pieces together and hold in vice. Drill the 6 holes for the bolts. |
|
| |
|
Step 3
Apply PVA Wood Glue  to all inner surfaces.
Insert 2 centre bolts but dont fully tighten yet. |
|
| |
|
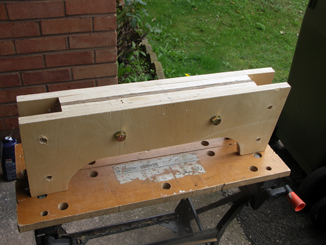
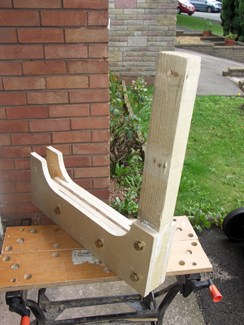
Step 4
Place side bar in position and drill 2 holes.
Apply PVA Wood Glue to top and insert 2 bolts. |
|
| |
|
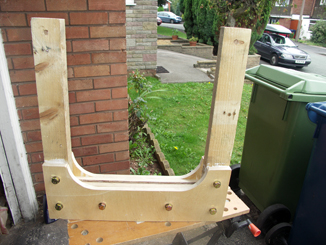
Step 5
Repeat with opposite side bar. |
|
| |
|
|
|
| |
|
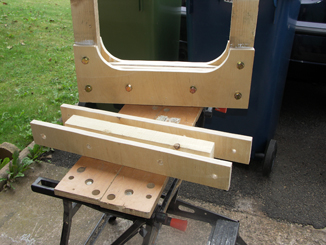
Step 6
Assemble The Top Bar. Bring the 3 pieces together and hold in vice. Drill the 4 holes for the bolts. |
|
| |
|
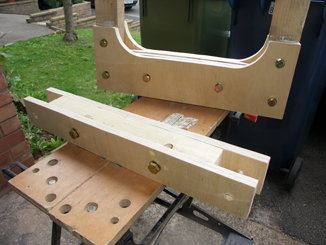
Step 7
Apply PVA Wood Glue to inner surfaces and insert 2 centre bolts but dont fully tighten yet. |
|
| |
|
Step 8
Put bottom bar into place and drill 2 holes.
Apply PVA Wood Glue to lower ends of side bars, insert bolts.
Use a Set Square to align at right angles then tighten all bolts with a Socket Set or Spanners. |
|
| |
|
Step 9
Fit 2 cross bars to press plate. Drill holes from underside, apply glue and screw in place. |
 |
| |
|
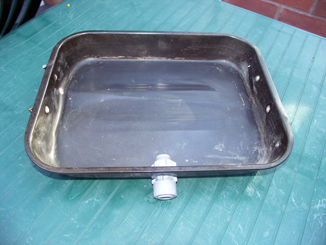
Step 10
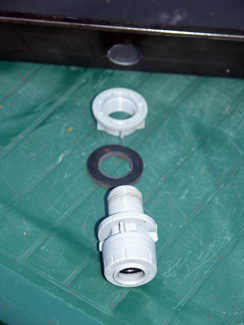
The juice collection tray is an old baking tray. I drilled a hole on one edge, filed it to the right size and fitted a plastic drain plug that I got from a DIY store. |
 |
| |
|
| Detail of drain hole and plastic drain. |
|
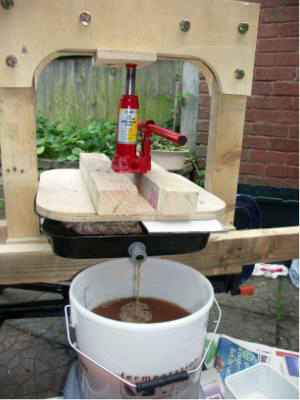
Step 11
Press some apples!
Note 1: I had to fit a piece of scrap plywood to the under side of the top bar as the Bottle Jack began to damage it. I will fit a metal plate for this years pressing. began to damage it. I will fit a metal plate for this years pressing.
Note 2: I fitted an Acrylic Sheet under the pressing plate to stop the juice soaking into the wood. under the pressing plate to stop the juice soaking into the wood. |
|
I hope the above information has been useful to you and wish you well with your construction.
However if you find that constructing a press is beyond your capabilities or you do not have the time to do it then there are a couple of ready made presses that I can recommend.
Click on the image to find out more |
|
|